lahlahyoga

Be the Buddha

LahLah’s thoughts on the mat this week: Be the Buddha!

This week in class we’re going to examine what we bring to the mat (and daily life!) with us, in terms of expectations, desires and attachments and look at if they are helpful or not. Do we need them? Or can we let them go and be present in what actually is? Can we be curious about our practice and about our lives and how they actually are rather than just living how we think they are? Can we do things just for the joy of being rather than for the outcomes or expectations of doing them?

This weeks theme was inspired by Eckhart Tolle’s poem “Be the Buddha”:

All cravings are the ming seeking salvation

Or fulfillment in external things and in the future

As a substitute for the joy of Being.

As long as I am my mind,

I am those cravings,

Those needs, those wants, attachments, and aversions,

And apart from there there is no “I'“

Except as a mere possibility, an unfulfilled potential,

A seed that has not yet sprouted.

In that state,

Even my desire to become free or enlightened

Is just another craving for fulfillment or completion in the future.

So don’t seek to become free of desire or achieve enlightenment.

Become present.

Be there as the observer of the mind.

Instead of quoting the Buddha, be the Buddha,

Be the “awakened one,” which is what the word buddha means.

Look forward to exploring this theme on the mat with you this week, if you want to join me you can at Little Peace, Altromondo & Yoga Shakti . Also check out bookretreats.com for self-discovery retreats.

Until then can you find the joy of being?

How should we practice yoga asana?

After a long absence from my “blog” (it’s hardly a blog though seeing as I haven’t written since 2017!! oh dear!) I have decided to start writing short weekly posts about aspects of yoga that I am sharing in my classes but also want to share with you here, little thought offerings. Some weeks they will be based on the physical alignment, maybe particular poses, some weeks they will look at yoga philosophy, other weeks the breath, and probably everything in between too. They will be short, easy to read and digest snippets that I hope you enjoy reading and learning about :) so here goes….!

This week I wanted to talk a little bit about how we should practice yoga asana, which is a pretty big question to answer in a short snippet, but there is a surprisingly simple answer from the ‘Yoga Sutras’ written by the sage Patanjali over 2000 years ago (although we have no exact date of writing). The ‘Yoga Sutras’ is a collection of 196 aphorisms (An aphorism is a brief sentence or phrase that expresses an opinion or makes a statement of wisdom) on the theory & practice of yoga. Of these 196 sutras, just 3 sutras relate to the physical practice of yoga.

Just 3!! That is less than 2% of the whole text.

Of those 3, one in particular strikes me, which is sutra 2.46 :

“sthira-sukham asanam”

This can translate as: asana should be practiced with steadiness & ease.

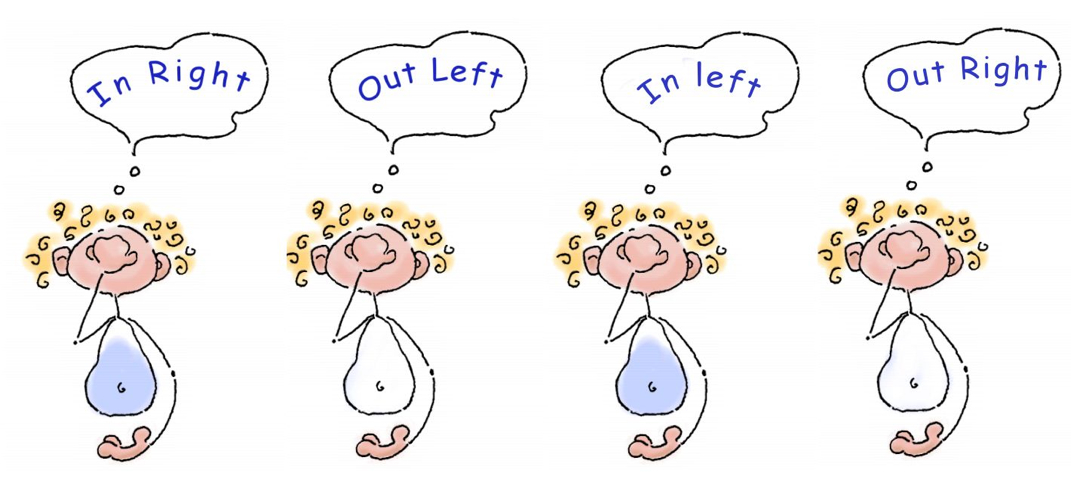
What does steadiness & ease mean? I like to think of it as being rooted & steady in whatever physical shape we might be in, as well as finding a sense of ease in this shape, in the breath, and in the mind. Ease through the breath, the body and the mind. This sounds easy right? But finding steadiness in some of the shapes we go into can already be a challenge, so ease on top of this can feel very far away. However, we can think of the mind as a muscle too and with our practice we can slowly start to train this muscle.

Through the awareness of our mind we can find ease in effort, calm in strength and steadiness in movement.

Each time we come back to this awareness, we strengthen this muscle so that the sense of ease becomes more natural both on the mat, and then also off the mat too.

So that’s it, we should practice asana (poses/shapes) with steadiness & ease. That is all. The Yoga Sutras make no reference to how ‘deep’ we should go into a pose, nor how flexible we should be, nor how many vinyasas we should do, nor handstands or headstands, but just to be steady & at ease.

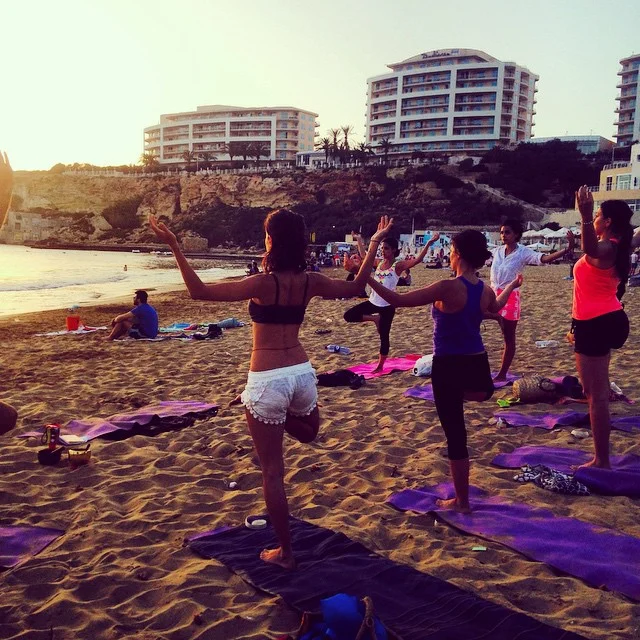
Next time you step onto your mat, see if you can find this sense of steadiness in your practice. Good ways that help me notice if I am steady and at ease are to ask myself the following questions:

  • Am I rooted? Am I stable? Do I feel like I have control of my body, or am I shaking and collapsing?

  • Can I breathe with ease?

  • Am I present, right here and now?

  • Is my jaw relaxed?

  • Can I bring a small buddha-smile to my face easily?

Hope you enjoyed this little snippet from my world of yoga, please feel free to comment with any thoughts this might have brought up for you!

Until next week, keep breathing steadily and smiling with ease!

The Benefits of Yoga for Skiiers

Have you ever thought about how perfectly skiing & yoga complement each other? Skiing is fast, adrenaline-pumping & risky. Yoga is calming, meditative & mindful. Combining the two creates a perfect balance of mindful fun.

The biggest benefit that yoga can bring to your skiing is injury prevention. Out on the slopes it is cold and we use our cold muscles in ways or in an intensity that we generally aren't used to. Yoga can help reduce stress, strain and possible injury.

If you're planning a skiing holiday I would highly suggest attending as many yoga classes as you can before you head into the snow. Balance, concentration, flexibility & strength form the basis of most yoga classes and these are also the most important skills to get you down the mountain with a big smile on your face!

See your yoga mat as you see you your skis…and see your skis as a yoga mat

Here are a few tips to help you find alignment on your skis:

  • Feet should be shoulder-width apart, as if in Mountain Pose, to create a stable base for the body.
  • Knees should be in line with the toes.
  • Hips should be tipped slightly forward. This is a somewhat unnatural position for most people; however, ski boots help encourage this shape in the lower body. This posture helps you gain control. 
  • Shoulders should be dropped, or relaxed, as in Mountain Pose.
  • Torso should be still & stable. Referred to as a “quiet upper body” in skiing, having a “still” torso is akin to riding a bicycle with the lower body doing most of the work while the upper body provides stability.
  • Hands should be in front of your body to encourage forward movement and to initiate pole plants.

Here are a few poses which will help strengthen, lengthen and balance you prior to skiing:

  • Forward fold: A yoga pose for hamstrings as it helps to loosen the back and stretch hamstrings and calves.
  • Warrior I and II : Stretches hip flexors and hamstrings on the back leg whilst strengthening feet, ankles, glutes and quads on the front leg.
  • Chair pose: classic ski and board pose, warms up and builds strength in quads. 
  • Reclined cobblers pose: improves flexibility of inner thigh muscles, which can cause knee injury in skiing if not stretched.
  • Tree pose: helps with balance, tones & strengthens quads, calves, ankles & spine whilst stretching hip flexors, inner thighs, chest and shoulders. Improves balance, promotes mobility in the hip and knee joint, very important for turns whilst skiing. 
  • Downward facing Dog: Stretches the back & opens the chest. Vinyasas can build core strength.
  • Crescent Pose (high lunge): stretches hip flexors & hamstrings on the back leg whilst strengthening feet, ankles, glutes & quads on the front leg. Low lunges are also good!

If the idea of yoga & skiing tickles your toes, have a look at our next escape:

Pause // Play // Ski

16th- 23rd March 2016

Morillon, French Alps

Daily morning yoga with a mountain view, afternoons to ski/board to your hearts content, a full body massage, meditation techniques for the curious, a B-EA-U-TIFUL chalet complete with a sauna and right next to the ski lifts. Oh, and of course stinky french cheese and wine are also included! 

Be kind to your wrists & shoulders sun salutation :-)

I've had a slight injury to my wrist recently which has made sun salutations and vinyasas a no-go for a while. After a week of a very, very gentle practice my body was raring to step it up a bit again, but my wrist not so much, so I came up with this 'Kind for your wrists & shoulders' sun salutation.  

Hope this is useful, and whenever your wrists & shoulders seem a bit tired, listen to your body, give them a break and integrate this into your practice instead for a few days :-)

Namaste!


How to: Keep your yoga practice injury free

Yoga is supposed to be a very healing, nourishing practice for our bodies, but like any activity if not done properly there is always a chance of injury. 

LahLah yoga: injury free yoga practice

But how do we keep our practice injury free? Here are a few tips:

ALWAYS BREATHE, AND BE PRESENT

When we are breathing, noticing our breath and present in our bodies we are very aware of what we are doing and can therefore feel if something does not feel good or if we are pushing too far. As soon as we start thinking about our to do list, that email we received earlier etc we stop being present, we stop being aware and we can easily injure ourselves. Generally if breathing becomes difficult in a pose it means that you may have come a little bit too far into the pose. Poses should always feel steady and comfortable. ALWAYS! 

JUST BECAUSE YOU CAN DO SOMETHING, DOES NOT ALWAYS MEAN YOU SHOULD

Recently in my own practice this has been coming up again & again. Just because technically you 'can' get into this particular pose, does not mean you should be doing it. When we first start practicing yoga we sometimes surprise ourselves about the things we can do with our body. It can be a boost to the ego and getting into these poses is a fun challenge that the ego pushes however as my practice has progressed I have learnt that just because I can does not mean I should. Two questions to ask yourself in any pose are: Am I in alignment? and does this feel good? 

As a yoga teacher, I sometimes, probably wrongly, feel like I should be able to do everything, but the truth is I am just a normal person - I get pain in my lower back sometimes, I suffer from tight shoulders and hips when I spend too long at the computer and I am not a naturally flexible person. Yoga has helped me hugely with these issues, and continues to which is why I decided to share the gift of yoga and it's power to heal not it's power to injure. Getting to the flexibility I have today has taken dedication - it does not come naturally and I still have a long way to go. Any students of mine may have recently noticed that I no longer sit in lotus position, not because I can't but because when I am really present and listening to my body I know this pose does not feel comfortable on my knees yet. This is not healing and nourishing my body. My hips are not yet open enough for the pose so the twist is coming from my knees. So for the mean time I choose to focus on opening my hips to be able to get there eventually.

It's important to remember that just because I, or any other teacher is leading you through a sequence of poses, if one does not feel right for you then you should not do it. Even if every other person in the room is doing it, it doesn't matter. Every single body is different and only you know how it feels for you. 

All you really have to do is let your body & your breath guide you in your practice as opposed to your ego. Honouring the teacher that is in YOU! 

LahLah's Zoodle Pad Thai

Zoodle (zucchini noodle) Pad Thai

If you've never tried a zoodle pad thai then you are missing out because, oh boy is it good! It's also conveniently healthy too ;-) 

I couldn't find a recipe I was happy with online, so I have been experimenting and am finally happy with the results!

The ingredients & recipe might look long, but it really is super simple to make and a lot of the ingredients are cupboard ingredients that you may already have, or will need to buy once and they will be there each time you make this (I'm sure you'll make it more than once, it's that yummy & easy to make!).

LahLah's zoodle phad thai

Ingredients: (feeds two hungry yogis)

Store Cupboard Ingredients:

  • 2 tsp tamarind paste

  • 3tbs fish sauce 

  • a handful of dry roasted, unsalted peanuts

  • a pinch of dried chilli flakes

  • a pinch of rock salt

  • a few good splashes of sesame oil

Fresh Ingredients:

  • 4 x zucchini (you will also need a spiralizer. I use this one. If you don't have one you could grate the zucchini on a large hole grater. same same, but different!)

  • 1 x red pepper (or your preferred colour of pepper!)

  • 1/2 a turnip (optional)

  • 3 x spring onions

  • 2 x red chilli

  • a big handful of mange tout

  • a big handful of coriander 

  • 1 x lime

  • 2 x big garlic cloves (or 3 small)

  • a small piece of ginger

  • and any other veg you fancy - I would add beansprouts too but I can never find them in Malta!

Method

  • Finely chop your spring onions, red chilli and place to one side in a bowl together. Slice your mange tout into thirds and add to this bowl.  Roughly chop your corriander and set aside

  •  Make your dressing: crush (or very finely chop) your garlic, grate your ginger and add the tamarind paste, fish sauce and the juice from half the lime to this and mix. 

  • Crush the handful of peanuts and a pinch of dried chilli flakes and rock salt in a pestle & mortar until the peanuts become big crumbs. Set aside.

  •  Sprialize your zucchini to make your zoodles. I use this very simple spiralizer.

  •  Finely slice (julienne them if you want to be fancy) your pepper and 1/2 the turnip (if using). 

  • Heat a BIG frying pan or wok on high heat with a few splashes of sesame oil, when it's heated add the zoodles, pepper and turnip to the pan. Lightly coat all in the sesame oil and fry for a few minutes. Don't cook the veg too much, just so it is heated through -approx 4 minutes. 

  • Take the zoodle mix off the heat, mix in the spring onions, chilli & mange tout. Add your dressing and mix well. Plate your zoodles and then add some chopped coriander and a sprinkle of your peanut chilli crumbs to the top. Serve with a wedge of lime & extra chilli flakes if you like it hot!

The perfect blend of taste, crunch, spice, yumminess & health!

Enjoy & please feel free to comment if you like it or if you find any delicious variations! Find nourishing retreats on bookretreats.com x x xxx

LahLah turns 1!

This month LahLah Yoga turns 1, and I would like to thank all the LahLah friends & family for your support and energy on the mat over the past year. 

The LahLah Studio in Tal-Ibrag, where the magic happens as caught be River Thompson http://www.riverthompson.co.uk/

The LahLah Studio in Tal-Ibrag, where the magic happens as caught be River Thompson http://www.riverthompson.co.uk/

It has been a wonderful year, full of stretching, breathing, twisting, bending, balancing & flying and I am so grateful to every single person who has stepped onto a mat with me! Each person brings their own energy, and I couldn't have made it this far without you.

I hope that those of you with a regular practice are really noticing the benefits of yoga in both your body & mind, and as always if you ever have any questions (no matter how silly it may seem to you) PLEASE ask away :-)

I can't wait for the next year!

Lah Lah x

"Be happy, Be bright, Be YOU!"

The LahLah 1st anniversary class at Golden Bay. Thank you to all those who joined!

The LahLah 1st anniversary class at Golden Bay. Thank you to all those who joined!


YOU are amazing!

This is your mid-week reminder that YOU are amazing. We tend to forget this fact all too often..

Take a moment just to stop, and notice your heartbeat, your pulse, moving inside of you. This energy which keeps us alive. Where does this energy come from? Our heart pumping of course, you say. But this pulse, this energy was in our bodies even before our hearts had developed in foetus form. Where did it come from then? "I got it from my MaMa" of course, but where did "yo Mama" get this energy from to begin with? From her Mama, who got it from her Mama, who got it from her Mama and so the chain continues. Feel your heart, feel your pulse again. The heart, supporting this pulse, but it did not create this pulse or this movement.  

This energy (or prana, or chi or magic, or whatever other name you may give it) inside of us has always existed long before we were here, and it will continue to exist long after we are gone, but for the moment we have inherited it, it is not ours to keep, but ours to cherish, ours to live, to love & to dance.

Sometimes we forget that we really are divine beings, made of stars with this wonderful energy inside of all of us. So here is your mid-week reminder that you are AMAZING and MAGICAL and you can do anything you put your mind to. 

I do believe in magic, do you?! 

LahLah xx

P.S. I would like to thank Leslie Kaminoff and his Yoga Anatomy Principles Course (which I am currently taking online) for inspiring this blog post and for reminding me that I am a divine being full of this wonderful energy too :-) !

Nadi Shodhana Pranayama: The better-than-a-double-espresso-for-waking-you-up breath!

Our breath: Probably the most vital process of the body. It influences the activities of each & every cell and is intimately linked with the performance of the brain. It also clears energy blockages in our nadis or energy channels. The breath is also closely linked to our mental state - when we get angry or anxious we may become short of breath but rhythmic, deep and slow respiration can help bring back a calm & content state of mind. 

Nadi Shodhana is a simple form of alternate nostril breathing which is great for both beginners & advanced students. 

BENEFITS OF NADI SHODHANA 

  • Balances energy channels (nadis) and clears energy blockages
  • Reduces anxiety & calms the mind
  • Lowers your heart rate. 
  • Improves concentration & clear thinking by balancing & synchronising left & right brain hemispheres. 
  • Helps release accumulated tension & fatigue so can therefore be used in the morning to wake you up as a more holistic alternative to your shot of espresso. 
  • When I am feeling very monkey minded and can't focus, I find that this breath helps bring me into the moment especially if I am counting my breath. 

NADI SHODHANA HOW TO:

  • Bring your right hand up in front of the face and extend your index finger and thumb allowing the other fingers the rest. 

  • Take your index finger to your eyebrow centre and rest it here gently. Now you will use your thumb to close your right nostril & your second finger to alternately close your left nostril.

  • Begin by closing your right nostril gently with your thumb, and inhale in through the left nostril. The breath should be slow, steady and full but not forced. 

  • When you have reached the end of your inhale, close the left nostril with the second finger and open the right nostril to fully exhale with a slow & steady breath.

  • Inhale in through the right nostril, & then switch to exhale through the left. That is one full round of the breath. 

  • Inhale through the left, & switch to exhale out of the right. Inhale through the right & switch to exhale out of the left. Remember we always switch nostrils on an exhale if you get confused.

  • Keep going for 5-10 rounds, and increase your rounds of breath as you begin to feel more comfortable with the breath. 

  • Release the hand & go back to normal breathing.

Nadi Shodhana can be practised at any time of day, but it is best to practice on an empty stomach. Remember to keep the breath slow, easy (never forcing it), and full and try to keep your inhales & exhales the same length (ie breathe in for a count of 4, and out for a count of 4).

Keep Breathing, Keep Smiling 

LahLah x

6 Reasons to Downward Dog

Downward dog is probably one of the most well known yoga poses, which even if you have never been to a yoga class you have probably heard of. When you begin practicing yoga, downward dog can be a little bit like torture, but the more you practice, the more comfortable it will feel and it will become more of a resting pose than an active pose. I LOVE this pose and cannot get enough of it at the moment. It makes me body feel sooo good, that sometimes I want to spend my whole practice just breathing in downward dog. 


But why exactly does Downward Dog feel SO good?

  • Downward Dog elongates and lengthens the back - a stretch so crucial in our modern sedentary lifestyle. The pose greatly helps to decrease back pain by strengthening the entire back and shoulder girdle and elongating shoulders and shoulder blade area.
  • Downward Dog is also a mild inversion which means it helps improve circulation therefore flushing toxins, regulating blood pressure, and boosting immune health.
  • The pose also stretches the hamstrings, toes, calves and arches, and feet- and keep wrists strong and supple. 
  • Downward dog promotes upper body & core strength; and also strengthens bone density and helps to prevent osteoporosis.
  • The pose is energizing: according to B.K.S. Iyengar, a mere minute in this pose will “bring back lost energy for runners after a hard race”. This works equally well for anybody just tired after a long day :-)
  • Downward dog focuses the extension of the cervical spine and neck, releasing compression and stress on the entire spine. If you’re able to shake your head gently yet loosely to the left, right, and up and down during this pose, you’ll be tapping into the anxiety-relieving muscle and mind benefits of the pose.

Downward Dog How to:

  • Come onto the floor on your hands and knees. Set your knees directly below your hips and your hands slightly forward of your shoulders. Spread your palms, index fingers parallel or slightly turned out, and turn your toes under.
  • Exhale and lift your knees away from the floor. At first you can keep the knees slightly bent and the heels lifted away from the floor to be able to really lengthen your spine and lift your sitting bones toward the ceiling. 
  • Once you feel the length in the spine you can begin to straighten the legs (as long as you can keep the length in the spine whilst doing so, otherwise keep legs bent for now) and take the heels down towards the floor - they may not touch yet but keep at it! Don't let your knees lock. Roll the upper thighs inward slightly.
  • Make sure your fingers are still spreading wide, pressing the base of all fingers actively into the mat. Firm your shoulder blades against your back, then widen them and draw them toward the tailbone. Keep the head between the upper arms; don’t let it hang.

Rememeber to always enjoy the pose, not pushing so much that it becomes uncomfortable. Keep breathing & keep smiling.

N.B. Downward dog is contraindicated for anybody with carpal tunnel syndrome, during late stages of pregnancy and for anybody with high blood pressure.